Some of the information flow processes carried out at the university include the element of making a decision regarding a document or action.
The most common case of making decisions (approving) is:
- acceptance (approve)
- reject
In the case of processes supported by tools such as Office 365 Flow, acceptance or rejection can be carried out via websites or through a special mobile application for Android, iOS smartphones.
This document provides an approval method based on email and a web-based approval panel.
The user who is to make a decision is informed about it via e-mail notification, the author of which is the Microsoft Flow service (Fig. Below)

The subject of the message depends on the process of the decision. The above figure shows the notification used to accept applications for the establishment of a distribution list in the mass mailing system of the Jagiellonian University.
An exemplary form of an e-mail message related to the approval process is presented below.
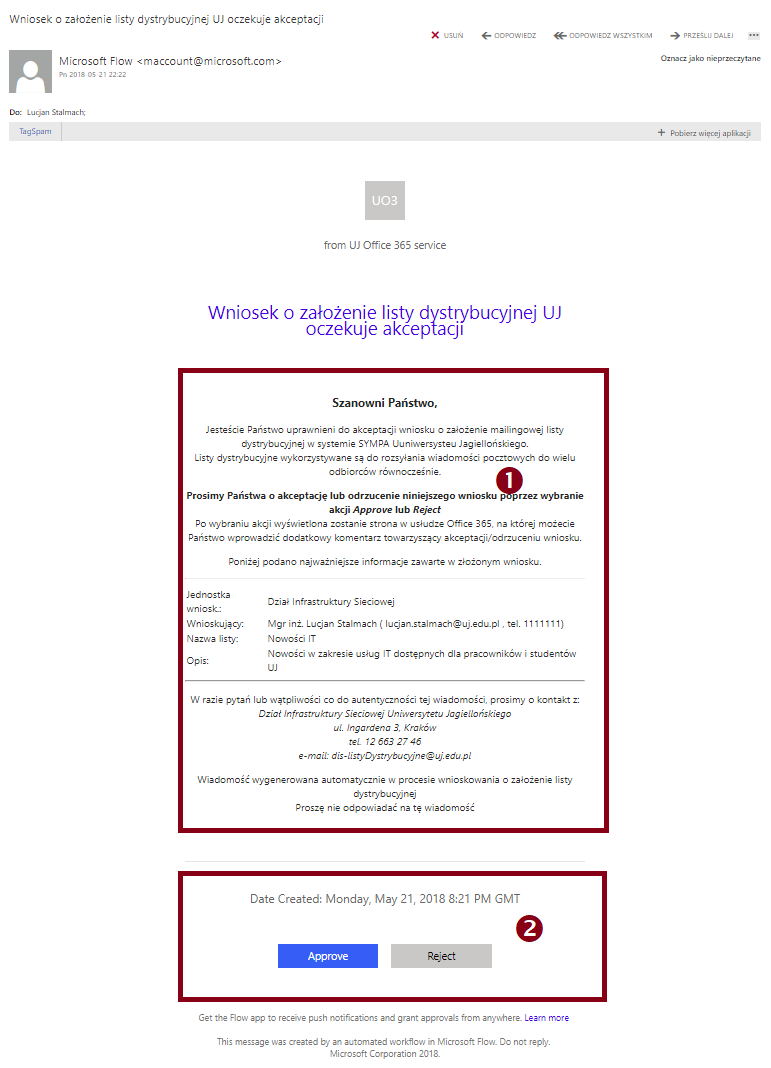
The central part (1) usually contains information relevant to the approval process (basic information about the document / application). The contact to the unit related to the implemented process is also given (in this case to the Network Infrastructure Department).
In the lower part (2) there are two approval buttons:
acceptance (Approve)
Reject
Pressing any of these buttons does not automatically confirm, but opens a panel for managing all user approvals in the web browser.
The approval panel is the central approval point for all processes that use Office 365 Flow. The approval panel looks like this.
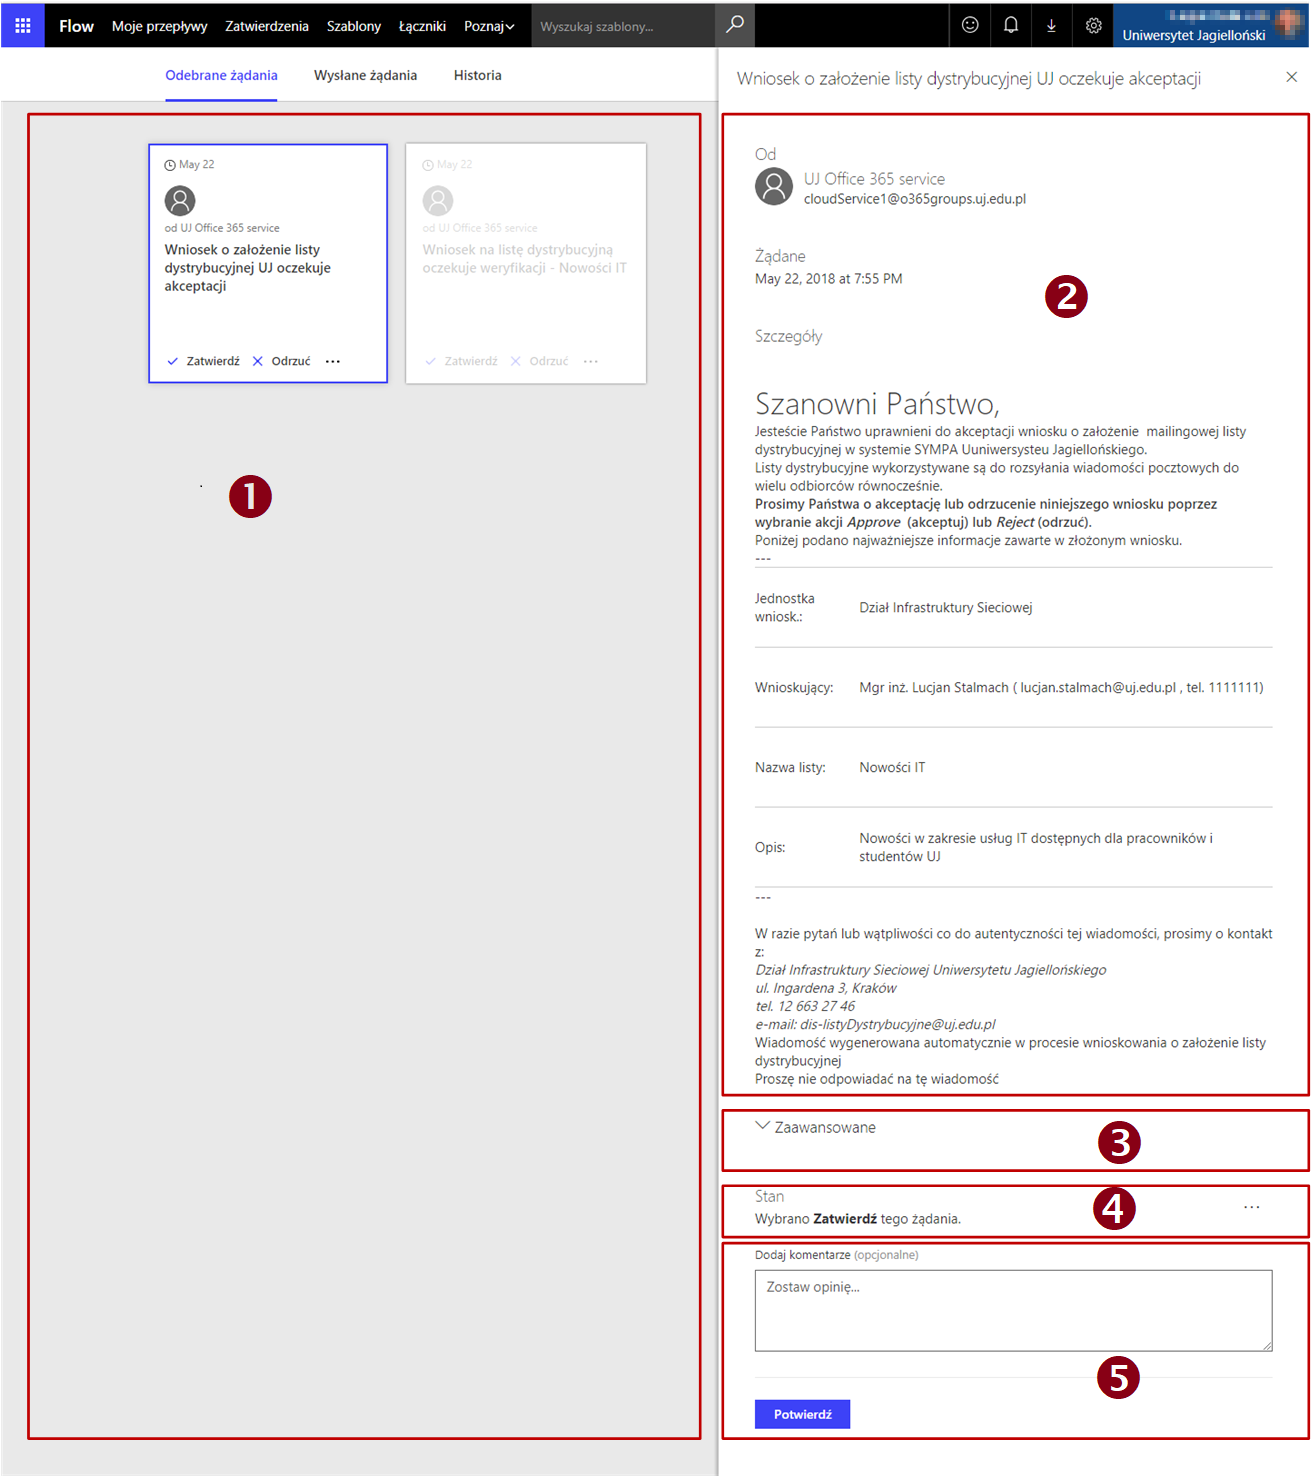
The left part of the panel (1) displays all pending approvals, but the approval that was triggered from the e-mail is displayed as active.
The right part displays the details of this commit (2).
To accept the decision made by clicking the button in the e-mail message, the user should press the Confirm button in the area (5).
If he wants to provide additional comments with the decision, he should enter them in the Add comment field under (5) before clicking.
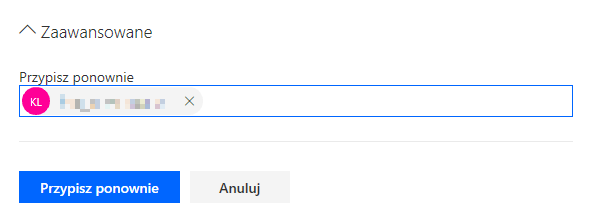
If the user wants to indicate another person to make a decision, he can do so by expanding the Advanced area (3).
After expanding, he will be able to indicate another person in the Reassign field by entering his / her e-mail or first and last name (if there are many people with the same name and surname, it is suggested to use an e-mail that will be automatically associated with the right person).